Google recently announced the launch of Google+ Pages, pages that allow users to create branded pages for businesses, artists, designers, bands and just about anything on Google+. With almost 50 million members, you should set up your Google+ Page as soon as possible. You can find a comprehensive list of big brands on Google+ in this article on allfacebook.com. You will need a Google+ profile to create a Page.
Insert Audiomind to help with this quick and easy guide on how to create a Google+ Page for your business.
1. Create Your Google+ Brand/Business Page
First thing you need to do is sign in to a Google account and input this link here:
http://www.google.com/+/business/
Click on the “Create your Google+ Page” button as demonstrated in the image above.
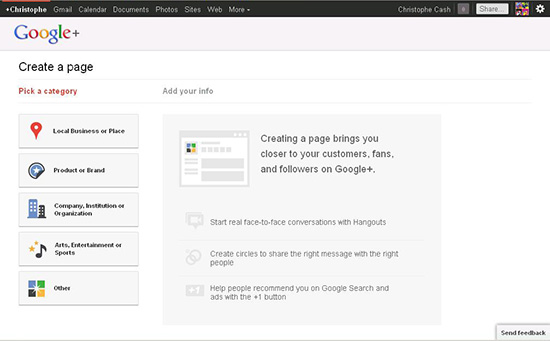
Now select a category that your business or brand can be classified as. The list of specific categories is long, so look over the options and select the best category that fits your page.
The categories include:
Local Business or Place
Suitable for: hotels, restaurants, places, stores, services. Hotels,
restaurants, places, services. Requires the primary phone number of the local business, so it can be located on Google Places.
Product or Brand
Suitable for: apparel, cars, electronics and financial services. Requires the selection of a secondary category.
Example secondary categories includes; Appliances, Arts and Entertainment, Auto, Baby and Kids, Public Figure, Fashion and Beauty, Computers and Hardware, Website and Media
Company, Institution or Organization
Suitable for: companies, institutions, organizations or non-profits. Also requires the selection of a secondary category.
Example secondary categories include; Banks and Financial, Education and Schools, Media, News and Publishing and Political Organizations.
Arts, Entertainments or Sports
Suitable for: films, TV, music, books, sports and shows. Also requires the selection of a secondary category.
Example secondary categories include; Album, Award Show, Blog, Book, Band, Concert Tour, Festival, Fictional Character, Radio Station, Record, Label and TV Channel
Other
Suitable if your business doesn’t fit into any other category above.
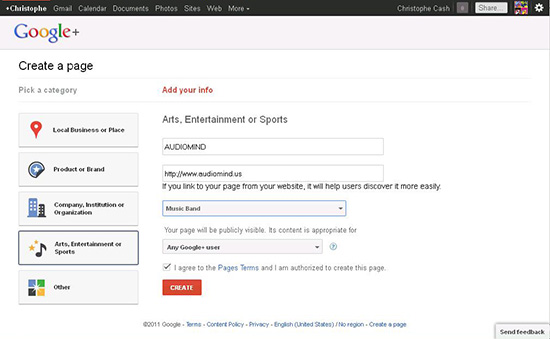
Once you select your category you will be prompted to fill out your page name and website. Also select who your content will be age appropriate for, agree to page terms and hit ‘Create’.
Age options include: Any Google+ user, Users 18 and older, Users 21 and older and Alcohol related.
3. Add Information to Customize Your Google+ Page
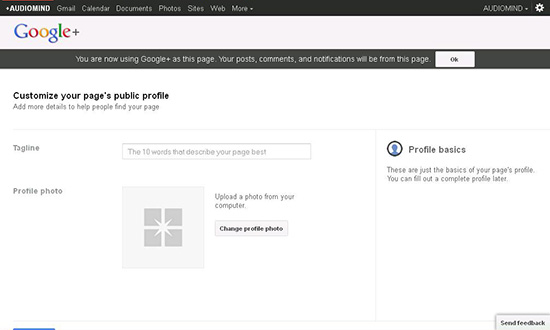
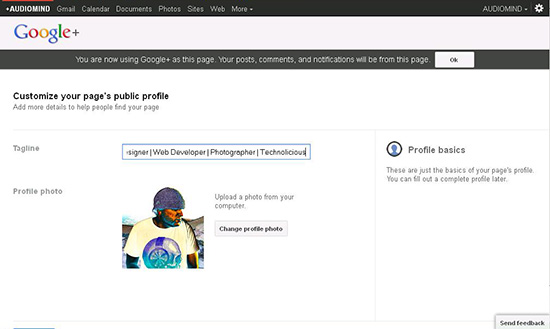
Now you will begin customizing your page’s public profile on Google+. The profile basics include your tagline (Your Page’s “Sales Pitch”) and a base profile image or logo. You have just 10 words to summarize your brand, make it count!
4. Profile Photo/Logo of Your Google+ Page
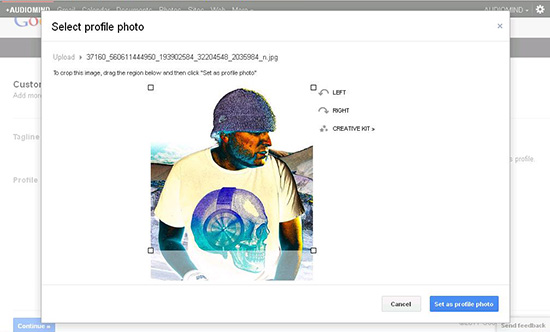
The image you upload will be square, and can be cropped after you upload it and appears to be about the same dimensions as the personal profile image. Click “Set As Profile Photo”.
5. Spread The Word About Your Google+ Brand Page
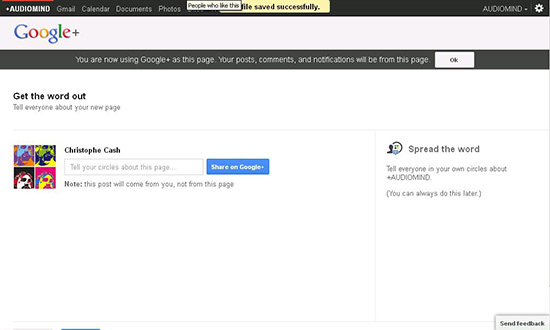
You’ve created the foundation of your Google+ page and you will now be prompted to promote your page. I suggest you optimize your page even further and add a few updates before exposing your page to the masses. A blank page won’t convince many folks that your Google+ Page is interesting enough to add to their Circles. Take note that the message you send here will come from your own profile, not from the Google+ Page you just created.
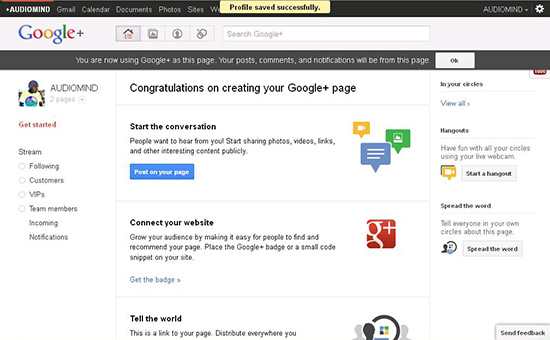
6. Congratulations On Your New Google+ Brand Page
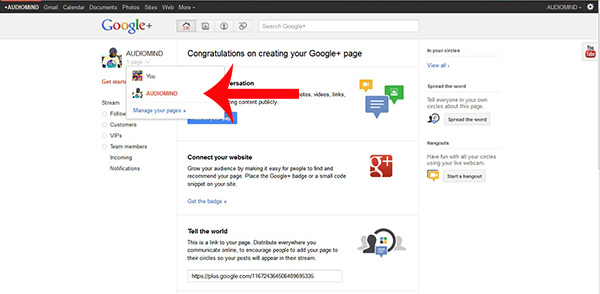
On your welcome page, Google+ will generate a link to your page (sadly not a vanity URL, YET). You will be given a Google+ Page Link with a string of random characters, much like what I have: https://plus.google.com/116724364506489695335 Optimize your Google+ business page and make it more engaging by “starting the conversation“. Click “Post On Your Page” and you can begin regularly sharing content and speaking to your fans.
From here you’re ready to go with your brand new Google+ business page.
7. Edit and Add Information To Your New Google+ Page
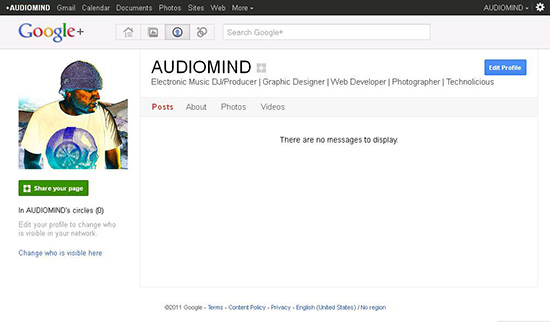
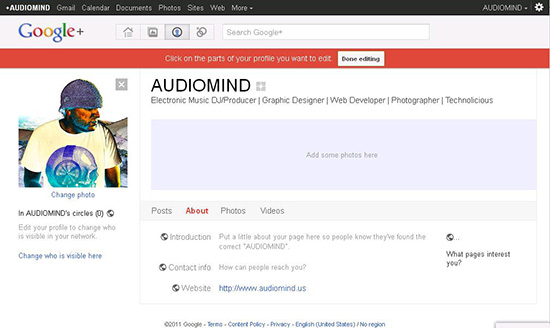
Edit your Google+ page profile by adding an”introduction“, “contact info” and ” website“, as well as photos. Under your Google+ Page’s name is a drop down menu that has now appeared. You can switch back and forth from your regular Google+ profile to your Google+ Page any time. The same menu will be on your Google+ profile showing the pages you’ve created with that account.
There are some differences between Google+ Pages and Google+ Profiles to remember:
- You cannot add people to circles until that person had added the Page or + mentioned it.
- You cannot +1 posts on Google+ or on the web.
- Defaults to public privacy settings.
- You will not receive notifications.
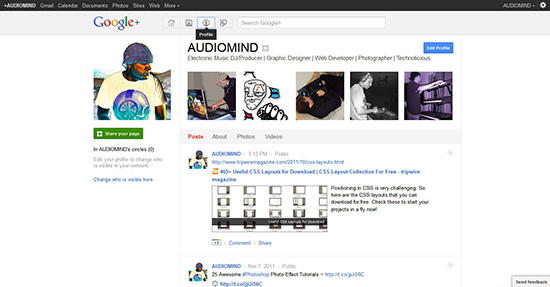
Your Google+ profile is now also the administrator of your new Google+ Page and unfortunately you cannot currently add more administrators to a page. Direct your mouse on over to the link on the left under your page name and click “manage your pages” and click the blue ‘edit profile’ button.
8. Google+ Direct Connect And Your Website
Install a snippet of code to your website and it will be eligible for Google+ Direct Connect. Connecting your website to your Google+ page helps you connect with friends, customers and fans. The Google+ badge will allow visitors to directly connect with and promote your brand on Google+. And once you’ve connected your website to your Google+ page, add a Google+ badge to help visitors find and engage with you on Google+.
To begin, click on the “Get started” link on the left side of your Google+ brand page profile and go to the “Connect your website” section and fill out the pertinent information.
9. Have Fun!
Hopefully this guide helped you create an awesome Google+ Brand/Business page.
Please leave a comment, especially if you have any questions!

Leave a Reply